
Master the battlefield with tactical genius Killjoy! Discover her unique abilities in Valorant for strategic play and invaluable team defense. Learn the best tactics now!
In the rapidly evolving landscape of tactical first-person shooters, the presence of a character like Killjoy in Valorant represents a keystone in strategic gameplay. As a german genius in the realm of technology, you harness her inventive prowess to fortify positions and outsmart opponents with an arsenal of gadgets. Your cunning use of Killjoy’s abilities not only disrupts the enemy’s tactics but also offers a versatile approach to defense and area denial, making you an indispensable asset to any team seeking dominance in the competitive theater of Valorant.
Overview of Killjoy
Role in Valorant
As you navigate the tactical landscape of Valorant, you’ll recognize Killjoy as an essential Sentinel agent, distinct for her area-denial capabilities and defensive prowess. Your utilization of Killjoy can significantly strengthen your team’s line of defense, fortifying sites against aggressive pushes or retakes with her array of inventive inventions.
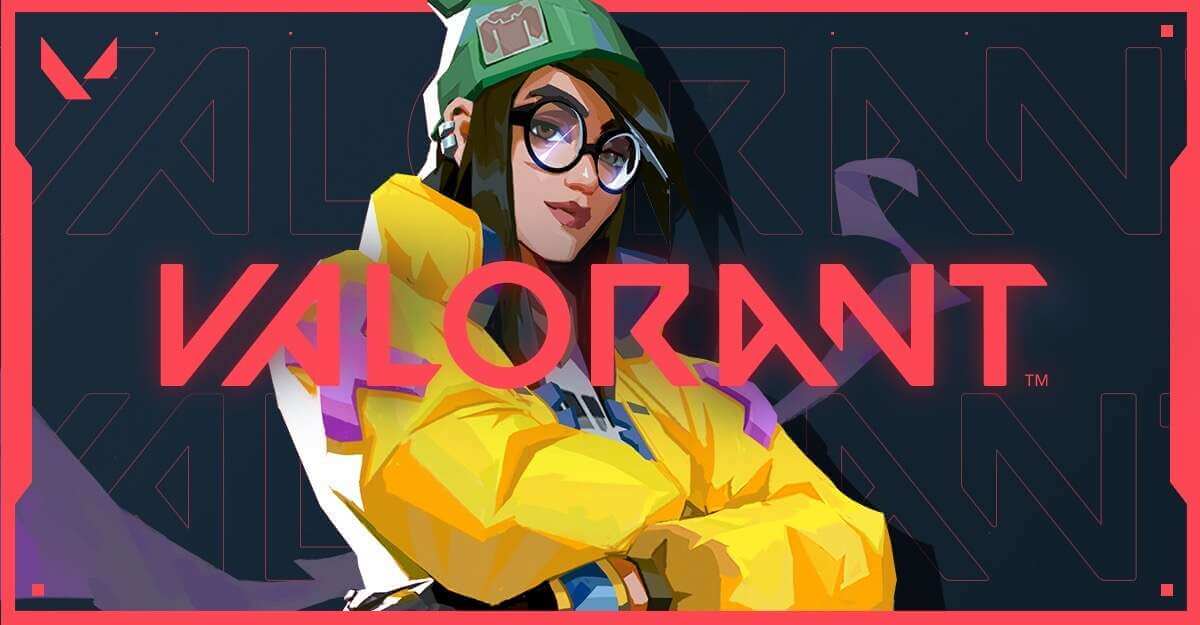
Backstory and Appearance
Killjoy, with her roots in Germany, brings a blend of ingenuity and efficiency to the Valorant protocol. Her visual persona radiates a flair for engineering, donning attire that’s both practical and reflective of her tech-savvy nature—a display of goggles, a tool belt, and her signature yellow and green color scheme. The precise attention to detail in her appearance is a testament to her meticulous and calculated nature.
General Playstyle
Adopting Killjoy’s playstyle, you’ll find an emphasis on strategic foresight and creative setup is key. Her abilities allow you to secure sites by laying traps that can surprise and weaken your adversaries, directly influencing the flow of the game. Primarily defensive, Killjoy requires a methodical approach, where forethought and positioning play crucial roles in maximizing her impact on the field.
Killjoy’s Abilities
Basic Abilities: Alarmbot and Nanoswarm
Mastering Killjoy’s basic abilities gives you the tools to both alarm and damage enemies. Her Alarmbot, deployable on any flat surface, covertly seeks out opponents within its vicinity, exploding upon contact to inflict Vulnerability. Simultaneously, the Nanoswarm grenade presents an opportunity for area denial, releasing a swarm of damaging nanobots when activated, ideal for unsuspecting enemies or protecting planted Spikes.
Signature Ability: Turret
The crux of Killjoy’s utility lies in her signature ability—the Turret. When placed, the Turret provides you a static line of defense, automatically targeting and firing at enemies within its 180-degree cone of vision. Not only does it deal damage, but it also serves as a vital source of information, alerting you and your team to enemy movements.
Ultimate Ability: Lockdown
Finally, Killjoy’s Ultimate Ability, Lockdown, can be a game-changer. When deployed, this device takes time to charge up before detaining all enemies caught in its wide radius, rendering them unable to use weapons or abilities. Lockdown’s strategic significance cannot be overstated—it can single-handedly sway the outcome of rounds when used judiciously.
Strategic Use of Abilities
Optimal Placement for Alarmbot
Your Alarmbot placement should be strategic, targeting choke points and common entry routes. Concealing it from plain sight increases its efficacy, allowing for a delayed enemy reaction and maximizing its potential to disrupt the opposition.
Effectively Using Nanoswarm for Area Denial
Using Nanoswarm effectively involves anticipation—place it in areas where enemies are likely to plant or defuse the Spike. Activating the grenade post-placement can catch adversaries off-guard, inflicting significant damage or deterring their advances.
Turret Positioning and Map Control
The Turret’s potential as an information tool and a deterrent is contingent on strategic positioning. As you familiarize yourself with various maps, identify positions where the Turret can oversee multiple pathways without being easily destroyed. This will grant you invaluable control over key areas of the map.
Timing and Placement for Lockdown
The impact of Killjoy’s Lockdown hinges on timing and placement. Utilize it during critical moments—such as retakes or preventing a plant—to gain the upper hand. Placing it in a location where it is protected and difficult to destroy is crucial for ensuring its detonation.
Strengths of Killjoy
Anchor Defense on Site
Your strength as Killjoy is your ability to single-handedly anchor a site. With judicious use of your abilities, you can hold off multiple attackers, buying your team precious time or thwarting their plans entirely.
Post-Plant Control
After a Spike is planted, your gadgets serve as an effective deterrent. Nanoswarm grenades can prevent defusal, while the Turret and Alarmbot help defend the Spike from various angles—even when you are not physically present.
Intel Gathering Capabilities
Aside from her defensive utility, Killjoy’s strength lies in her ability to gather intelligence. All her abilities serve dual purposes as both deterrents and information gatherers, giving your team a situational awareness edge.
Weaknesses of Killjoy
Vulnerability to Utility
Despite her strengths, Killjoy is not without weaknesses. Your gadgets are susceptible to enemy utility; explosives, EMPs, or creative plays can dismantle your setup, leaving you and your site vulnerable.
Dependence on Setup Time
Your effectiveness hinges on pre-round setup time. A rushed setup or a quick pivot mid-round can compromise the strength of your defenses, emphasizing the need for foresight and quick decision-making.
Limitations in Offensive Plays
Killjoy’s kit is less suited for aggressive plays. Most of her abilities are static, which limits her flexibility and impact during offensive pushes when compared to more dynamic agents with abilities that favor attacking scenarios.
Tips and Tricks
Creative Alarmbot and Nanoswarm Combinations
Experiment with combinations of Alarmbot and Nanoswarm to create traps that can decimate unaware opponents. Placing a Nanoswarm on top of an Alarmbot can trigger a devastating one-two punch.
Effective Use of Turret in Unpredictable Locations
Position your Turret in unexpected spots to catch the enemy off guard—on elevated surfaces or behind sightlines that are not commonly checked. Revising its location regularly prevents the opposition from adapting and countering it easily.
Maximizing Impact of Lockdown
Use Lockdown to not only detain, but also to divert and manipulate enemy movements. Deploying it as a zoning tool can funnel your adversaries into a disadvantageous situation, making them easy targets for your team.
Adapting Killjoy’s Playstyle in Different Maps
Each map presents unique challenges and opportunities for Killjoy. Learn the intricacies of each arena to understand the best gadget placements, enhancing your impact regardless of the battlefield’s topology.
Synergies with Other Agents
Combinations with Information Gatherers
Pairing Killjoy with agents who excel in information gathering—such as Sova or Cypher—can compound the intel your team accrues, creating a network of surveillance that is difficult to navigate undetected.
Team Strategies with Duelists
Collaborate with Duelists on your team to create pincer attacks. While Killjoy’s utilities hold certain areas, Duelists can capitalize on the enemy’s distraction and push for aggressive plays.
Utilizing Controllers for Enhanced Area Denial
Controllers, with their smokes and area-denial abilities, can be synchronized with your setup to seal off areas entirely. This synergy heightens the defensiveness of a site and can lead to formidable choke points.
Counterplaying Killjoy
Exploiting Killjoy’s Setup Time
When facing a Killjoy, exploit her setup time by playing unpredictably and forcing her to constantly reposition her gadgets, thereby reducing their effectiveness.
Identifying Common Turret and Utility Spots
Learn and anticipate common Killjoy placements. Awareness of typical gadget spots enables you to pre-emptively check and dismantle Killjoy’s setup with minimal resistance.
Utilizing Agents and Abilities to Counter Lockdown
Select agents that can counter Lockdown, such as those with EMP-like abilities or ultimates that can destroy the device. A well-timed counter can negate Killjoy’s most impactful asset.
Killjoy’s Role in Team Composition
When to Pick Killjoy
Choose Killjoy when the map or team strategy emphasizes a solid defense, or when you need a reliable sentinel to hold sites or provide post-plant security.
Map-Specific Strategies
Develop and adapt Killjoy strategies that cater to the unique features of each map. Exploit her utilities’ strength in maps with critical choke points, and adjust placements to respond to common offensive strategies.
Balancing Team Utility with Killjoy
Ensure that the team composition complements Killjoy’s kit—pair her with agents that fill the gaps of her defensive focus, creating a versatile and balanced team utility.
Cosmetics and Customization
Skins and Variants for Killjoy
Cosmetic enthusiasts can access a variety of skins and variants for Killjoy, enabling personal expression on the battlefield. These items range from whimsical to seriously sophisticated designs, reflecting the diverse tastes of the Valorant community.
Killjoy’s Influence on Valorant’s Aesthetic
Killjoy’s presence in Valorant contributes to the game’s vibrant aesthetic, blending tactical gameplay with a playful visual narrative that is brought to life through her distinctive character design and abilities.
Customization Tips for Enthusiasts
Immerse yourself in the customization possibilities for Killjoy by exploring skin collections and personalizing your agent’s appearance. Combining unique weapon skins with character cosmetics can make your Killjoy not only a formidable presence but also a showcase of your style.