
Discover the secrets of Valorant’s Bind map—master teleporter tactics, unique design philosophy, and strategic gameplay for dominance.
In the competitive arena of Valorant, the Bind map stands as a testament to strategic diversity and dynamic gameplay. With its distinct lack of a traditional middle area, Bind forces you to rethink your approach to control and area dominance. Its unique teleporters introduce an innovative layer to tactical movement that can be leveraged for swift flanking maneuvers or to outmaneuver opponents during high-stakes encounters. Mastery of Bind offers you not just a series of gunfights, but a chess-like battle of wits and positioning that can turn the tide in the most critical moments of play.
Overview of Bind
Bind is a distinctive map that poses a unique challenge within the tactical shooter game, Valorant. Setting itself apart from other maps with its design philosophy, Bind forces teams to adjust their playstyles and strategies to accommodate its unusual features.
Bind’s Unique Design Philosophy
Bind’s design takes a significant departure from traditional tactical shooter maps by omitting what is typically known as the “middle” or “mid” section. This development choice shapes the flow of the game, as it affects sight lines, rotations, and territory control. With no central area to contest directly, teams must rely on lateral movement across the map to outmaneuver their opponents.
Lack of a Middle Area
Your strategic approach on Bind must account for the absent middle area, which usually offers a direct route for flanking or splitting attacks on other maps. Given its absence, your decisions on Bind pivot more on map extremities and control over the peripheral zones.
Presence of Teleporters
Arguably the most definitive feature of Bind is its pair of teleporters, which provide instantaneous travel from one point to another. This unique element introduces a new layer of strategy, as teams must account for rapid rotations and surprise plays through these portals.
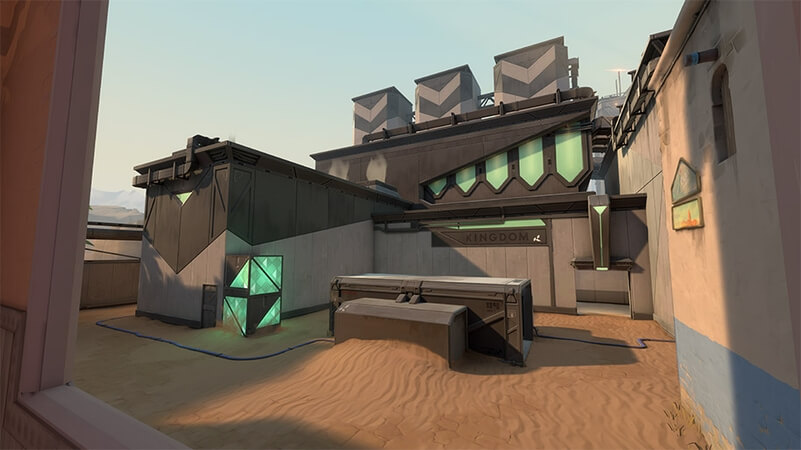
Map Layout and Callouts
A Site Breakdown
A Site on Bind is a complex area with multiple angles of engagement. You have the Showers, a vital control point for attackers, and the A Short area, leading up to the site. For tackling A Site, your team must clear tight corners and be mindful of the elevated positions that defenders often utilize.
B Site Breakdown
B Site is characterized by a long corridor known as B Long and a choke point called Hookah. The site offers numerous hiding spots and an elbow area that can be crucial for retakes or post-plant defense. B Site’s layout necessitates precision utility usage to flush out entrenched enemies.
Important Map Callouts
Understanding callouts on Bind is critical for efficient team communication. Key callouts include A Lamps (also known as U Hall), A Truck, B Garden, and B Elbow. Familiarize yourself with these terms, as precise communication can be the difference between victory and defeat.
Common Strategy & Positioning
Attacking teams on Bind often split their focus between A and B sites, utilizing lurkers to catch rotating defenders. In contrast, defenders must be vigilant, strategically using utility to delay enemies while ensuring they can rotate quickly through teleporters or around the map’s perimeter if needed.
Teleporters Strategy and Impact
One-Way Teleporter Mechanics
The teleporters on Bind are one-way systems, meaning once you go through, there’s no immediate way back. This mechanic introduces high stakes to their use, as your commitment can be exploited by quick-thinking opponents.
Strategic Advantages of Teleporters
When used cleverly, teleporters can grant your team significant advantages. They can facilitate a quick rotation from one site to another, support fast retreats from unfavorable engagements, or enable surprise attacks that disrupt the enemy’s defensive setup.
Risks and Sound Cues
While teleporters can be a boon, they come with inherent risks. Using a teleporter broadcasts a loud, map-wide sound, notifying everyone of your move. Carelessness with teleporters can swiftly turn into a disadvantage, alerting enemies to your strategy and position.
Teleporters and Map Control
Maintaining control around the teleporters can be a critical aspect of your overall map strategy. Containment of these areas can limit the enemy’s mobility options and give your team a significant edge in maintaining map control.
Spawn Points and Initial Pathways
Defender Spawn
From the Defender Spawn, you have swift access to points that allow engagements at A Short, B Long, and B Site. Your initial responsibilities often involve setting up defensive positions and utility to halt enemy advances or gather early information.
Attacker Spawn
The Attacker Spawn offers initial pathways towards both A and B sites with diverging routes leading to Showers, A Short, B Long, and Hookah. The choice of these initial pathways can dictate the pace and style of your attacking round.
Initial Movement Options
Your first movements out of spawn are paramount, often dictating engagement timings and enemy rotations. Quick control of resource-heavy areas such as Showers or Hookah can afford your team significant tactical leverage as the round unfolds.
Early Round Strategies
An effective strategy in the early stages of a round is to position players for map control while keeping the enemy guessing about your team’s intentions. Push for info, make your presence known to divide the defense, and use utility to deny or gather intelligence.
Objective Sites A and B
A Site Layout and Defense
Defending A Site entails a mix of aggressive stances to hold Showers and A Short, as well as passive positions that optimize retake chances. Utility usage to prevent rushes is vital, and one must be aware of vertical plays from the attacker’s side.
B Site Layout and Defense
B Site defense focuses on Hookah and B Long, with an emphasis on dissipating rushes and leveraging B Site’s nooks for ambushes. You must balance your attention between both entry points while being prepared for post-plant setups.
Post-Plant Positions
After a plant, you should take up positions that enable crossfires on the site, with consideration for potential defuser locations. Showers control on A and B Garden on B can be particularly crucial for defending the spike.
Retake Strategies
Retake situations demand coordination and utility synchronization. Smoke off common post-plant spots, use recon abilities to gather intel, and work with teammates to retake sites from multiple angles simultaneously.
Economy and Buy Rounds on Bind
Impact of Teleporters on Economic Decisions
The presence of teleporters can influence your economic choices, as faster rotations mean weapons and utility can have a heightened impact. A well-timed force buy with a teleporter play can upset the rhythm of full-buy rounds from your opponents.
Buy Round Considerations
During regular buy rounds, your team must consider the necessity of sufficient utility to secure sites or flush out defenders. The correct balance of firepower and tactical gear is paramount to seize control of nooks and chokepoints on Bind.
Saving Strategies
On saving rounds, when your economy is weak, take up unexpected positions or stack sites to bolster your chances of inflicting economic damage on the opposition. The teleporters can also offer quick escape routes to save weapons for the next round.
Force Buy Scenarios
Force buys can be particularly potent on Bind, given the surprise factor and close-quarter nature of sites. Risky buys with shotguns or SMGs can pay off when positioned in areas like Hookah or A Lamps, where engagements are tight and sudden.
Agent Synergies and Picks
Best Agents for Bind
Agents with abilities that control territory, offer rapid rotations, or gather information excel on Bind. Consider including controllers like Brimstone for smokes, duelists like Phoenix for entry frags, and sentinels like Cypher for information and site security.
Agent Abilities That Excel on Bind
Abilities that can bypass walls or offer vertical play are highly effective. These include Sova’s recon bolt, Raze’s explosive satchels, or Omen’s teleportation. Such utilities enhance your engagement options significantly.
Balancing Team Composition
A well-balanced team comprises agents that can hold and retake sites, provide intel, and deny or control areas with their utilities. You must consider synergy and the overall stratagem you wish to employ on Bind.
Counter-Picks and Strategies
Identify prevalent picks on Bind and select agents that can counter those strategies. For instance, bringing in an agent like Viper can counter aggressive controller plays, thanks to her ability to reclaim territory with toxic screens and mists.
Utility Usage and Control
Smokes and Vision Control
Controlling sight lines with smokes is vital, especially when considering Bind’s tight choke points like A Short and Hookah. Smokes can stall pushes, create safe passages, or enable defuses under the cover.
Molotovs and Area Denial
Molotov-type abilities are excellent for area denial, clearing common hiding spots, or delaying retakes. Understand the common plant spots and positions defenders favor to maximize the effectiveness of your area denial tools.
Recon Abilities
Gathering intel with recon abilities is invaluable for both attackers and defenders. Knowing enemy positions allows for informed decisions and better resource allocation during engagements.
Breach and Entry
Breach and entry abilities help in disrupting fortified sites. Consider the use of flashes, stuns, or wall penetration to break through enemy defenses or to disrupt a post-plant scenario.
Advanced Tactics and Positioning
Off-Angle Holding
Employing off-angles can catch opponents by surprise, as standard pre-aiming won’t be as effective. Strategic use of lesser-used angles can yield key frags that tilt the round in your favor.
Flanking Maneuvers
Consider the timing and sound cues when attempting flanks, as Bind’s unique layout can make flanking both risky and rewarding. Balance aggression with the intel you gather to pull off successful flanks.
Vertical Play and Elevation
Utilize Bind’s vertical elements, like boxes or ledges, to gain an altitude advantage. Different elevation levels in areas like B Site or Heaven near A can provide superior sight lines and unexpected angles.
Timing Pushes
Coordinated timing on split pushes or simultaneous utility deployment can overwhelm defenses. Sync up with your team to hit sites from different directions, or use diversionary tactics to split enemy forces.
Community and Tournament Reception
Player Feedback on Map Design
Player feedback on Bind has pointed to its distinctive playstyle, with some appreciating the strategic depth of teleporters and the challenge of no middle area, while others find it to be a polarizing departure from traditional designs.
Popularity in Tournament Play
Bind has been a staple in tournament play, often leading to intriguing matches due to its distinctive features. Teams have showcased various styles and strategies, demonstrating Bind’s potential for diverse tactical play.
Recent Changes and Balances
Valorant’s developers have kept a close eye on Bind, making adjustments to balance gameplay and ensure competitive viability. Changes made are typically a result of keen community feedback and data analysis.
Future of Bind in Valorant
As the game evolves, so too might Bind. Future updates and player creativity will continue to shape how Bind is played within Valorant. Whether through small tweaks or major reworks, Bind’s place in Valorant will be one to watch.
Through understanding Bind’s unique aspects, from its teleporters to the absence of a middle ground, you can approach this Valorant map with the knowledge and strategy needed to succeed. Familiarizing yourself with agent synergies, economy management, and advanced tactics will make you a formidable opponent on this challenging battlefield.